Making Books truly interactive#
In the modern world, where information is abundant and attention spans are short, interactive content has become a critical factor in successful education. Interactive content engages learners by providing an immersive and engaging learning experience that goes beyond passive consumption of information. Interactive content allows learners to actively participate in the learning process, making it more memorable and increasing retention. By combining various media, such as text, images, audio, video, and interactive elements, educators can provide a more comprehensive and engaging learning experience. Interactive content also enables learners to progress at their own pace, allowing them to focus on areas where they need more help and skip over content they already know. As such, interactive content is a powerful tool for modern education that can help learners retain information, stay engaged, and achieve better results.
Previously in this tutorial, we have described, how Jupyter Book performs exceptionally well in providing the means for interactive content. But how do you make content like code cells or graphics interactive?
In this part of the tutorial, you will learn just that!
Objectives 📍#
Learn how to make your code cells run interactively
Learn how to embed interactive graphics in your book
MyBinder#
In today’s digital age, there are many tools available for interactive learning, and one of the most exciting ones is MyBinder. MyBinder is a free and open-source service that allows users to create custom computing environments for their projects, experiments, and interactive learning activities. It allows users to create and share executable versions of their code in a reproducible and accessible format, enabling interactive learning experiences for students, researchers, and developers.
MyBinder is built on top of Jupyter, an open-source web-based computing environment that enables interactive data science and scientific computing. MyBinder allows users to create a customized version of Jupyter, including their choice of libraries, programming languages, and data sets. Users can then share a link to their Binder environment, allowing others to reproduce and interact with their work.
One of the primary benefits of MyBinder is its ease of use. It requires no installation, configuration, or maintenance of software, making it accessible to users of all skill levels. Anyone with a web browser can access a MyBinder environment, making it an ideal platform for sharing interactive learning activities with a broader audience.
Another significant advantage of MyBinder is its reproducibility. By sharing a Binder environment, users can ensure that their code, data, and results are all accessible and reproducible, even if they change or update their code in the future. This feature is especially important for researchers, who must ensure that their results are accurate and can be replicated by others.
MyBinder is also an excellent tool for collaborative learning. It allows users to share their work with others, collaborate on projects, and learn from each other’s code. Additionally, MyBinder can be used to teach programming and data science concepts in a hands-on, interactive way. Teachers can create Binder environments that provide students with everything they need to get started, including tutorials, data sets, and code examples.
The How-To#
One of the great things about Jupyter Book is that it allows users to integrate MyBinder environments directly into their books, allowing readers to interact with and run code directly from the book’s pages.
1. Setting up the MyBinder environment#
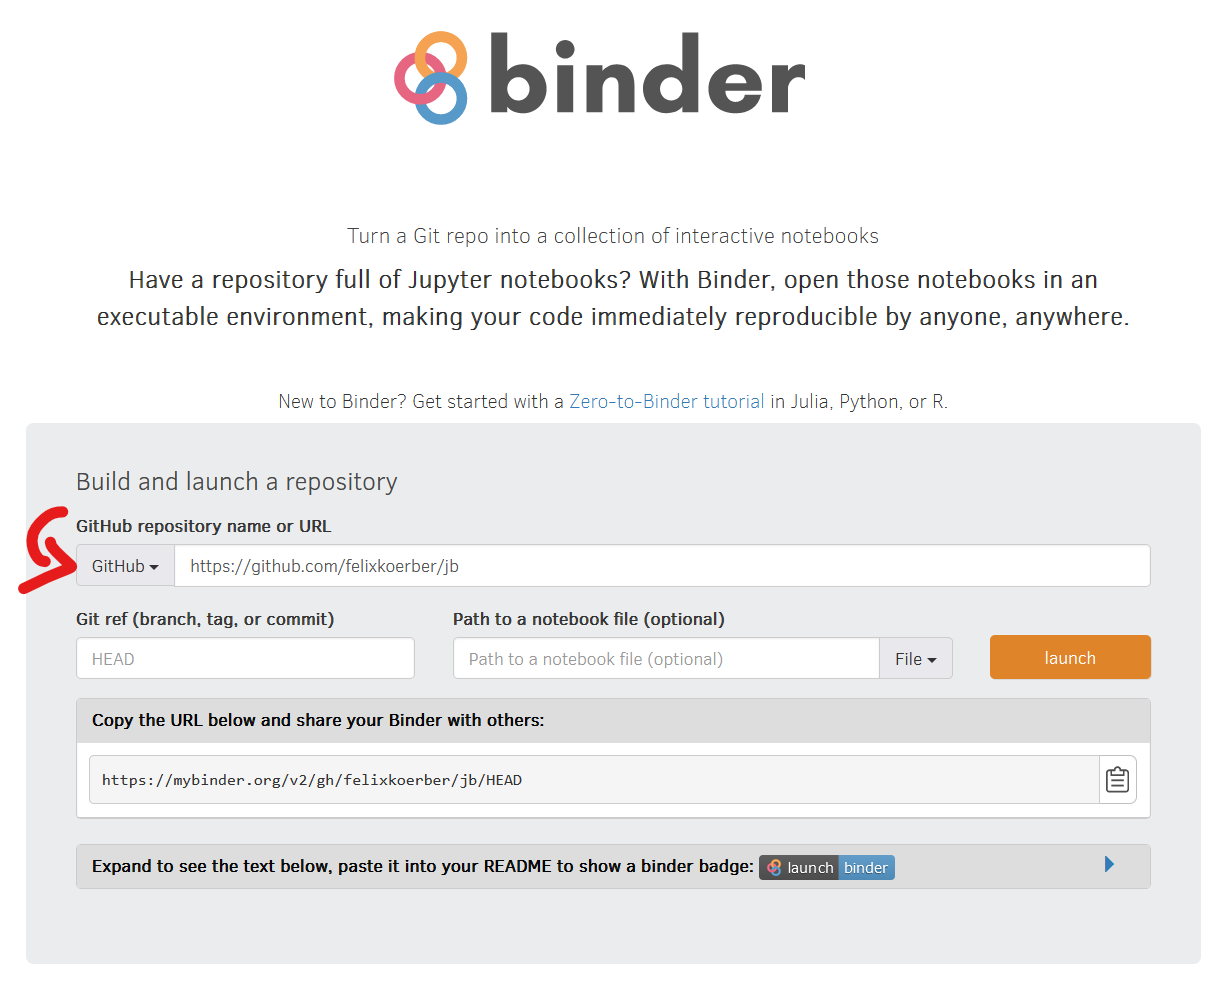
To integrate MyBinder into a Jupyter Book, the first step is to create a Binder environment using the MyBinder website. Once the environment is set up, the next step is to add a MyBinder badge to the Jupyter Book’s repository. This badge is a clickable image that will launch the MyBinder environment when clicked.
Visit mybinder.org, add the link to your GitHub-repository and click on launch
2. Changing the _config.yml#
To actually make your changes visible, you will have to modify the _config.yml file found in the lecture folder of the template, add the following bit of code:
launch_buttons:
  notebook_interface        : "classic"  # The interface interactive links will activate ["classic", "jupyterlab"]
  binderhub_url             : "https://mybinder.org"  # The URL of the BinderHub (e.g., https://mybinder.org)
  thebe                     : true  # Add a thebe button to pages (requires the repository to run on Binder)
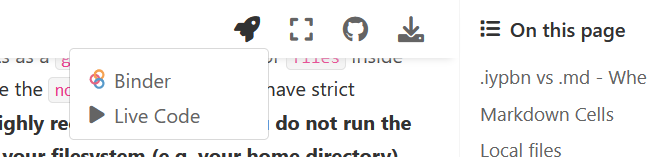
Now, both the Binder- and Live Code Badge are displayed on your Book and you should be good to go!