Quick Setup Guide for Deploying Courses using Jupyter Book on Github#
You have some experience in setting up or just want the quickest way to a finished Jupyter Book? This is the page for you. While we can’t give you a lot of information in 10 steps, this page condenses the creation and hosting process of Jupyter Books. Click on the section titles to jump into the respective in-depth tutorials.
1. Make sure you have all the prerequisites installed#
Before you start setting up your course using Jupyter Book, make sure you have the following tools installed on your machine:
Git: A version control system that helps you keep track of your code changes.
Jupyter Book: A tool that helps you build and publish interactive books or documents. You can install Jupyter Book using pip install jupyter-book.
A text editor of your choice: You can use any text editor, such as Visual Studio Code, Sublime Text, or Atom, to create and edit your content.
2. Create a fresh Git Repository for your project#
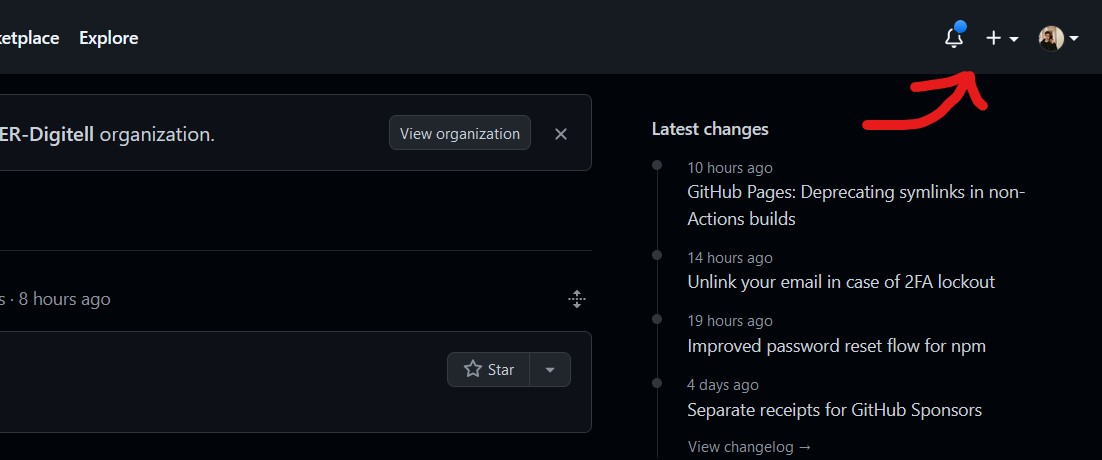
2.1. Go to the GitHub website (github) and click on the plus button on the upper right corner.
2.2. Create a new repository for your course by giving it a name and a description.

2.3. On GitHub, open up the empty project in your browser.
Navigate to
settings,actions, thengeneralto change Workflow permissions to Read and Write Permission to change the Workflow permissions to Read and Write Permission. This will allow you to push changes to the repository from your local machine.
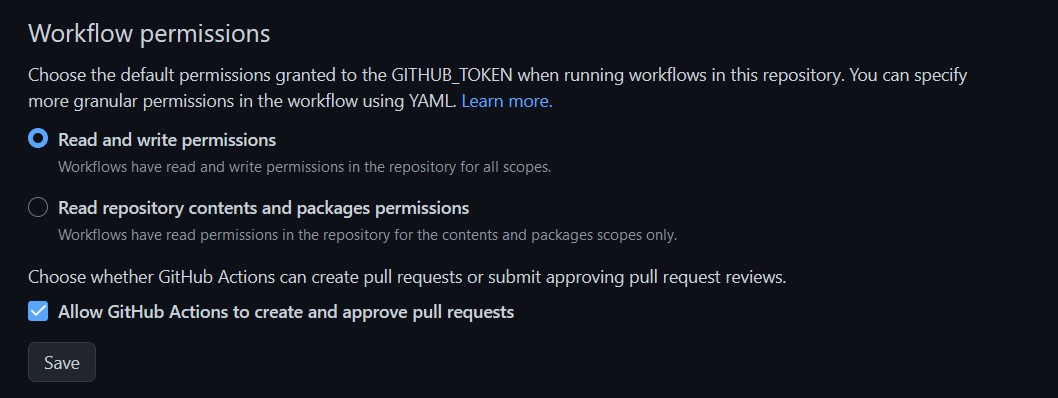
2.4. Save your changes.
2.5. Open up a terminal window and navigate to the location where you want to store your local course copy.
2.6. Copy the project’s link and clone the repository using the following command: git clone yourprojectname.
3. Copy our course template#
open our course template repository
click on
codeand then on Download ZIP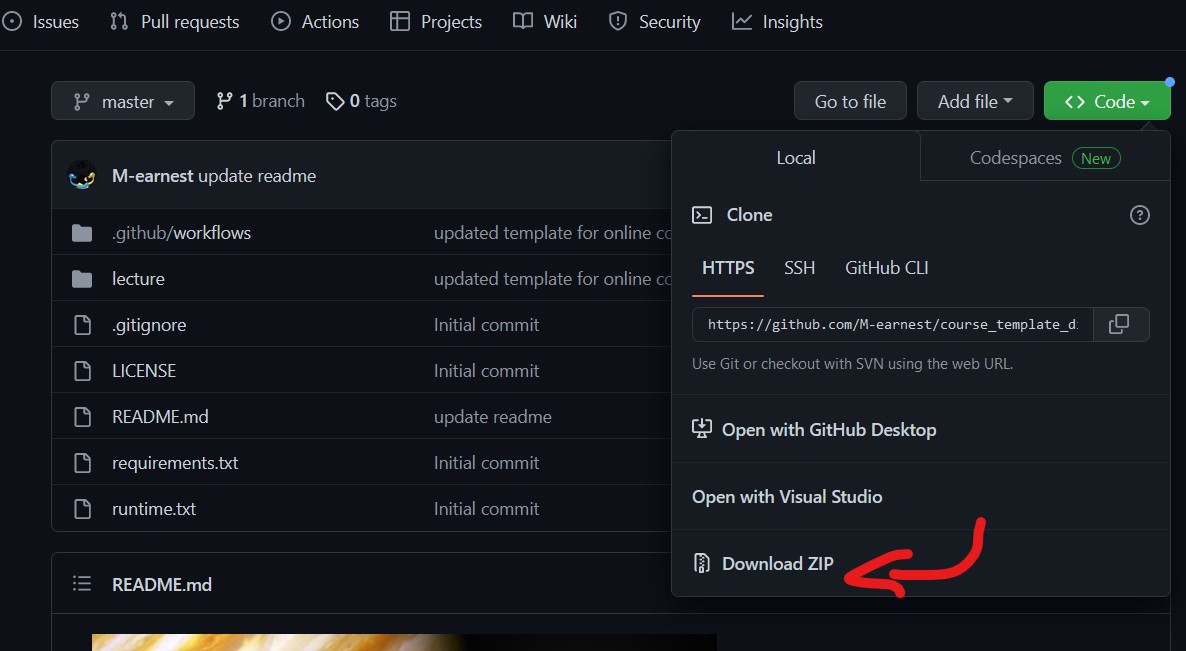
Extract the contents of the ZIP file in the folder linked to your GitHub repository.
4. Create Content#
Open the Markdown (.md) or Jupyter (.ipynb) files and copy your interactive content and code.
Make sure to give each file a meaningful name and add a title to each page.
You can use the provided style guide as a reference to see how to effectively implement MyST Markdown.
5. Table of Contents and config#
Once you’ve created files, open the
_toc.ymladd your newly created files in the sequence of your choice according to our template
open the
_config.ymlChange the title, author, and the location of your GitHub repository.
7. Add the pages#
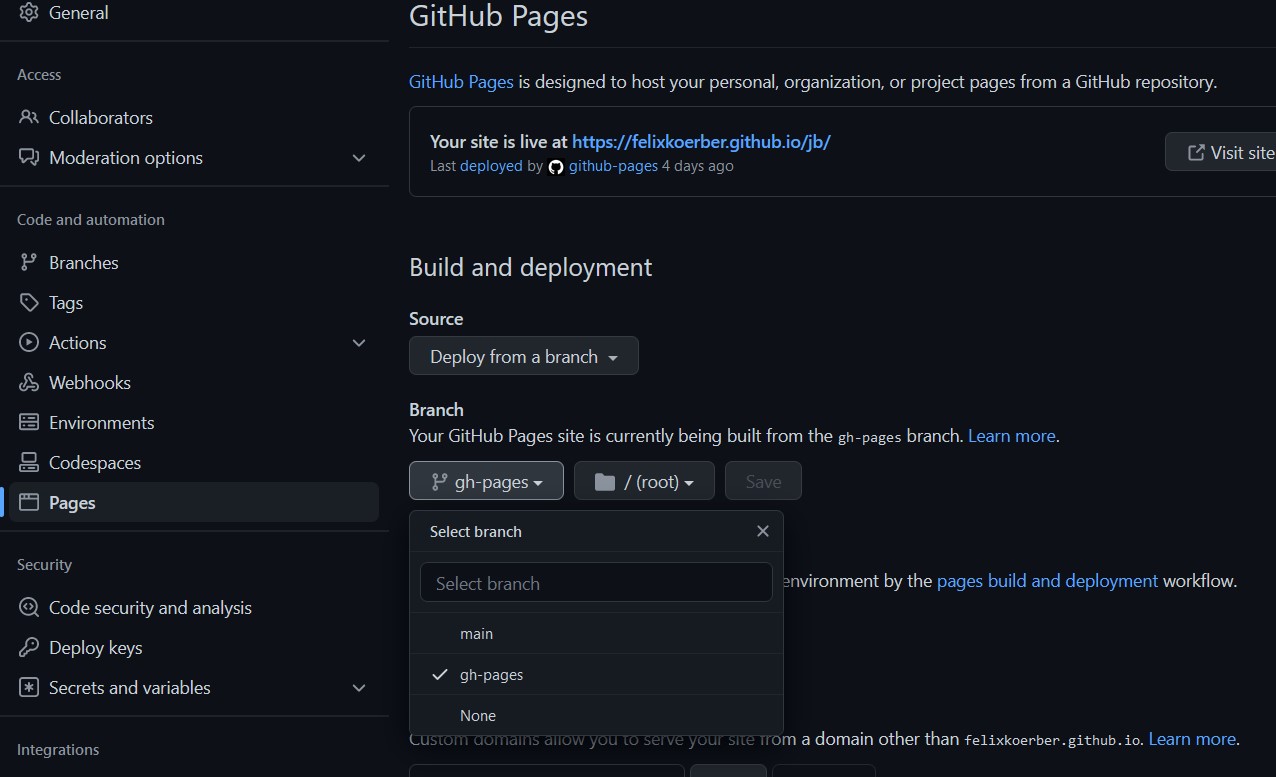
On Github, navigate to
settingsandpagesClick on
branchand selectgh-pages
 You’re all set! Once you’re ready, make sure to make your repository public, so that others can view your beautiful website.